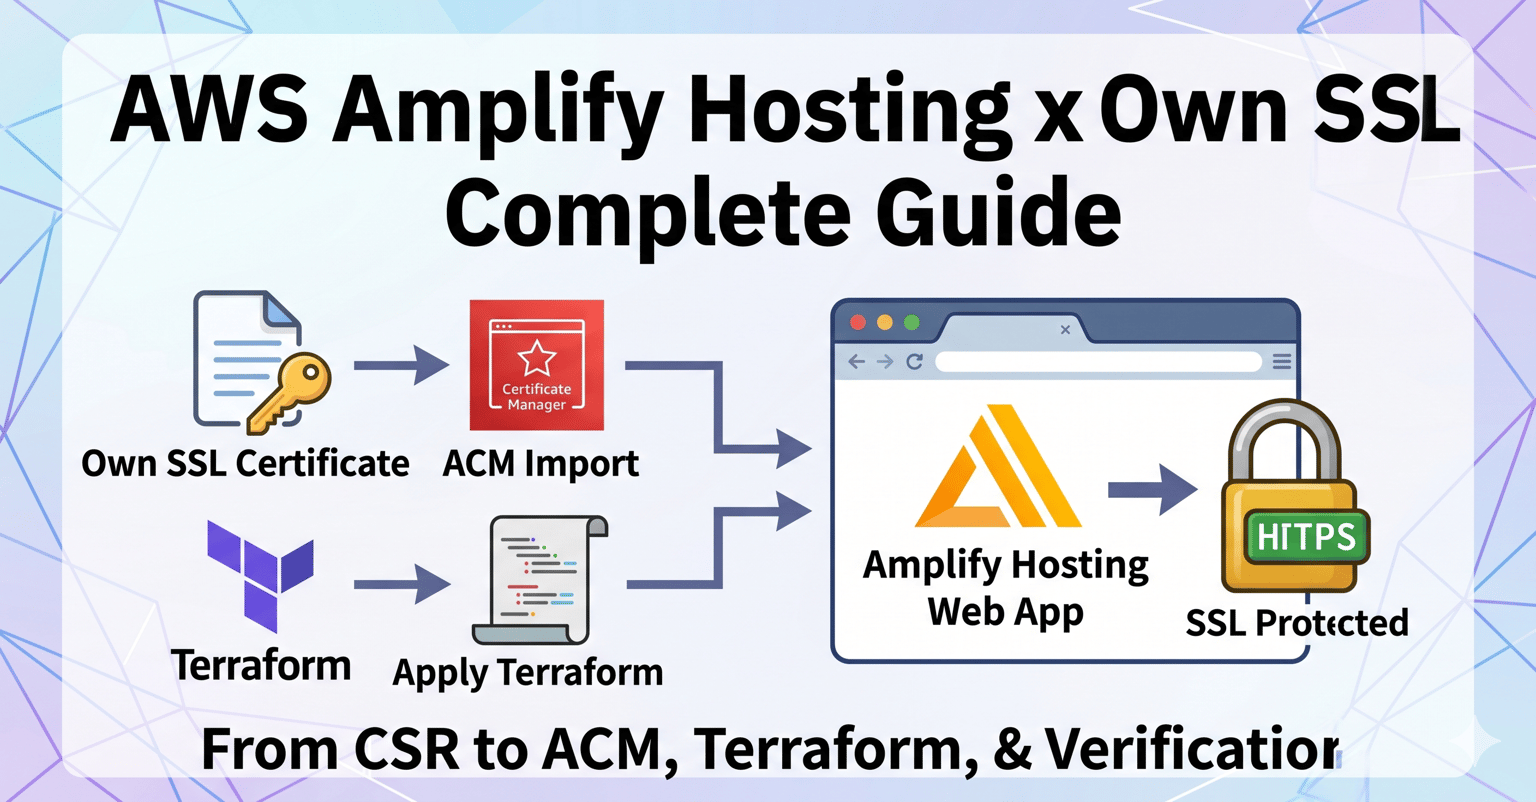
A Complete Guide to Bringing Your Own SSL Certificate to AWS Amplify Hosting (CSR, ACM Import, Terraform, and Verification)
目次
Hi there! I'm @Ryo54388667 ☺️
I work as an engineer based in Tokyo. Lately I've been lucky enough to own projects end-to-end — from infrastructure to backend to frontend.
In this post, I'll walk you through how to apply your own SSL/TLS certificate to a custom domain on AWS Amplify Hosting, with enough detail that even junior engineers can follow along.
I recently hit a requirement at work: a web app running on AWS Amplify Hosting had to use a server certificate issued by a specific CA. By default, Amplify auto-issues and auto-renews ACM-managed certificates, so we tend to forget this is even a thing — but in enterprise and government projects, "You have to use the certificate we specify" comes up surprisingly often.
This article is for you if you:
- Want to apply an imported certificate (your own SSL/TLS certificate) to Amplify Hosting
- Want a single end-to-end walkthrough from CSR creation, through ACM import, Terraform configuration, all the way to verification
- Are stuck on Amplify's
certificate_settingsblock when wiring up the domain association - Have been doing this implicitly without really understanding the difference between server, intermediate, and root certificates
It's a bit of a long read, so feel free to skim the table of contents (the step list below) and jump to the sections you need 🙏.
A Quick Refresher on SSL/TLS Certificates 📋
#When we say "SSL certificate," there are actually three kinds of certificates that chain together to establish trust. If this part is fuzzy, you'll struggle to debug ACM import errors later — so let's get the foundations straight first.
How the trust chain works
#When a browser opens an HTTPS site, the server hands it a server certificate plus an intermediate CA certificate. The browser walks this chain back up to a root CA that's pre-installed in the OS/browser to confirm "yes, this domain is legit."
[Root CA certificate]   ← pre-installed in the browser/OS (self-signed)
        ↑ signs
[Intermediate CA cert]  ← issued by the root CA, sits in the middle
        ↑ signs
[Server certificate]    ← the one tied to your domain (the one you got via CSR)
This idea of "walk upward and you should hit a root I know" is what's called the Chain of Trust.
The three things you hand to ACM
#When you import into ACM, you split this chain into three parts:
File | Contents | ACM argument |
|---|---|---|
Server certificate | The cert issued for your domain (single cert) |
|
Chain certificate | Intermediate CA + Root CA, concatenated in order |
|
Private key | The one you generated alongside your CSR (never share!) |
|
A few non-negotiable rules here:
- ✅ Don't include the server cert in the chain (it would double up with
--certificate) - ✅ Order the chain
intermediate → root(child to parent) - ✅ The private key must be unencrypted PEM
ACM will reject you mercilessly if any of these are off, so please keep them in mind ☺️.
Imported cert vs. ACM auto-issued — which should I use?
#Aspect | ACM auto-issued | Imported certificate |
|---|---|---|
Issuer | Amazon Trust Services | Any CA you choose |
Auto-renewal | ✅ Yes | ❌ No (manual) |
Expiry monitoring | Not needed | You build it yourself |
Domain validation | DNS or Email | Not needed (already issued) |
CA-specified requirement | Not supported | Supported |
If you don't have a "CA must be X" or "specific certificate profile" requirement, ACM auto-issued is overwhelmingly easier. Choose imported only when operations rules force you to use a specific certificate 🙏.
Prerequisites (Tools and Permissions)
#Before we touch anything, let's get the local environment and permissions in place.
Tools to install locally
#openssl version
# e.g., OpenSSL 3.x.x (1.1.1+ recommended)
aws --version
# e.g., aws-cli/2.x.x
terraform version
# e.g., Terraform v1.6.xAWS permissions you'll need
#At minimum, log in with a user/role that can call:
acm:ImportCertificateacm:DescribeCertificateacm:ListCertificatesamplify:UpdateDomainAssociation/amplify:GetDomainAssociationcloudwatch:PutMetricAlarm(if you're adding expiry monitoring)
Terraform provider requirement
#To use the certificate_settings block, you need AWS Provider v5.57.0 or later. Confirm required_providers:
terraform {
  required_version = ">= 1.6.0"
  required_providers {
    aws = {
      source  = "hashicorp/aws"
      version = "~> 5.57"
    }
  }
}
The full flow
#We'll go through 8 steps plus an operations section.
Step 0: Generate the CSR and private key, and have your CA issue the certificate
Step 1: Confirm/convert the certificate files to PEM format
Step 2: Build the certificate chain file
Step 3: Verify the certificate and private key are a matching pair
Step 4: Import into ACM (us-east-1)
Step 5: Update the Terraform configuration
Step 6: terraform plan & apply
Step 7: DNS configuration (CNAME record)
+ Verification & expiry monitoring
Let's go through them one by one!
Step 0: Generate the CSR and private key
#To get a certificate from a CA, you first generate a CSR (Certificate Signing Request) and a private key locally.
A CSR is essentially an application form that says "Please issue a certificate for this domain with these attributes." It contains your public key plus applicant information (country, organization, FQDN, etc.). The private key is its counterpart — and the side you guard with your life.
CSR generation command
#openssl req -new -newkey rsa:2048 -nodes -sha256 \
-keyout private.key \
-out request.csr \
-subj "/C=JP/ST=Tokyo/L=Minato-ku/O=Your Organization Name/CN=your-app.example.com"What each option does:
req -new: Generate a new CSR-newkey rsa:2048: Generate a key pair on the spot (RSA 2048-bit; some CAs require 4096-bit)-sha256: SHA-256 as the signing algorithm-nodes: Don't password-protect the private key (ACM rejects encrypted private keys, so this is essentially required for Amplify use)-keyout: Output path for the private key-out: Output path for the CSR-subj: Pass subject information inline
What goes in subj
#Field | Meaning | Example |
|---|---|---|
| Country code (2 chars) |
|
| State/Prefecture (English) |
|
| City/Locality (English) |
|
| Organization (English) |
|
| Fully Qualified Domain Name |
|
| Organizational unit (optional) | (Some CAs forbid this) |
Some CAs reject CSRs that include OU or have organization-name length limits (e.g., 64 chars). Always read the CA's submission rules before firing the command.
Inspect the generated files
## View the CSR contents in human-readable form
openssl req -in request.csr -text -noout
# Check the first line of the private key
head -1 private.key
# → -----BEGIN PRIVATE KEY------text -noout means "show the contents in human-readable form, and don't print the encoded BASE64 data." Use this to confirm the Subject: line in the CSR matches what you intended.
⚠️ Never put
private.keyin Git. Add*.key*.peminfra/certs/to your.gitignore. If it leaks, you'll have to revoke and reissue the certificate immediately 😱.
After you submit the CSR to your CA, you'll eventually receive the server certificate (server.cer), the intermediate CA certificate (intermediate.cer), and the root certificate (root.cer). These are what we'll work with from the next step on.
Step 1: Confirm the certificates are PEM format
#ACM only accepts PEM format. Even files with a .cer extension can be either PEM (text) or DER (binary), so check first.
Check whether it's PEM or DER
#head -1 server.cer- Shows
-----BEGIN CERTIFICATE-----→ PEM (use as-is) - Garbled / binary output → DER (needs conversion)
PEM is BASE64 text wrapped in -----BEGIN ...----- -----END ...----- markers; DER is its binary counterpart. That's the whole difference.
Convert DER → PEM
#If the file is DER, convert it with OpenSSL:
# Server certificate
openssl x509 -inform DER -in server.cer -out server.pem -outform PEM

# Intermediate CA certificate
openssl x509 -inform DER -in intermediate.cer -out intermediate.pem -outform PEM

# Root certificate
openssl x509 -inform DER -in root.cer -out root.pem -outform PEM
After conversion, run head -1 server.pem once more to confirm -----BEGIN CERTIFICATE----- is there.
Check whether the private key is encrypted
#Same drill for the private key:
head -1 private.key
# -----BEGIN PRIVATE KEY-----            ← OK (PKCS#8, unencrypted)
# -----BEGIN RSA PRIVATE KEY-----        ← OK (PKCS#1, unencrypted)
# -----BEGIN ENCRYPTED PRIVATE KEY-----  ← NG (encrypted)
If you see the word ENCRYPTED, the key is locked. ACM will reject it, so decrypt it first:
# Output to a different filename — overwriting the input is asking for trouble
openssl rsa -in private.key -out private.unencrypted.key
# It will prompt for the passphrase
💡 You might wonder, "Can't ACM just decrypt it for me?" No — AWS explicitly rejects encrypted keys for security reasons, so just decrypt them up front.
Step 2: Build the certificate chain file
#To import into ACM, you'll need three things:
- The server certificate (not in the chain — passed separately)
- The chain certificate (intermediate CA → root CA, concatenated)
- The private key
Why is the server certificate not in the chain?
#ACM's API treats the server certificate (--certificate) and the upstream chain (--certificate-chain) as separate parameters. If you stuff the server certificate into the chain, ACM tries to validate "this server certificate using the server certificate above it (?)" — which makes no sense and just errors out.
Chain ordering rule
#A common stumbling block is the order of the chain. The rule is "the cert that signs the previous one comes after," which means intermediate → root (child to parent):
mkdir -p infra/certs/stg

# Build the chain file (intermediate → root, in this order)
cat intermediate.pem root.pem > infra/certs/stg/chain.pem

# Copy the server cert and private key over (and standardize the names)
cp server.pem  infra/certs/stg/certificate.pem
cp private.key infra/certs/stg/private-key.pem
⚠️ Watch out for line endings (a classic gotcha)
#A surprisingly easy way to break things here is line-ending issues. Two flavors:
- PEM files without a trailing newline (LF): When you
cattwo files together, you can end up with-----END CERTIFICATE----------BEGIN CERTIFICATE-----smashed onto a single line, which makes the result un-parseable as PEM. CAs sometimes ship files without a trailing newline. - CRLF line endings: Files that came through Windows often have
\r\nline endings, which can confuse OpenSSL or ACM in subtle ways.
Both produce roughly the same symptom — ACM rejects the import with Could not parse certificate.
So before you run cat, sanitize each PEM file:
# 1. Check whether the file ends with a newline (LF = 0a)
tail -c 1 intermediate.pem | xxd
tail -c 1 root.pem         | xxd
# → "00000000: 0a"   means the file ends with LF ✅
# → no output / a different byte → no trailing newline ❌

# 2. Normalize CRLF → LF (or use `dos2unix` if you have it)
sed -i.bak 's/\r$//' intermediate.pem root.pem

# 3. Make sure there's exactly one trailing newline (safe even if one already exists)
for f in intermediate.pem root.pem; do
  [ -n "$(tail -c 1 \"$f\")" ] && printf '\n' >> "$f"
done
Once that's clean, re-run cat intermediate.pem root.pem > infra/certs/stg/chain.pem. As a final sanity check, eyeball the merged chain:
# Confirm each cert's BEGIN/END markers sit on their own lines
grep -n "BEGIN CERTIFICATE\|END CERTIFICATE" infra/certs/stg/chain.pem
# Expected output (each marker on its own line):
# 1:-----BEGIN CERTIFICATE-----
# 23:-----END CERTIFICATE-----
# 24:-----BEGIN CERTIFICATE-----
# 47:-----END CERTIFICATE-----
If you see something like -----END CERTIFICATE----------BEGIN CERTIFICATE----- on a single line, the file's broken. Re-sanitize the inputs and cat again 🙏.
Verify the contents of the chain
## Count the certificates in the chain (should be 2: intermediate + root)
grep -c "BEGIN CERTIFICATE" infra/certs/stg/chain.pem
# → 2If you get 2, you're good. 1 means the root is missing; 3 means the server cert snuck in. Fix and retry.
💡 Some CAs ship multiple intermediate certificates for cross-root setups. In those cases,
2may legitimately go higher — follow the install guide your CA gave you.
Step 3: Verify the certificate matches the private key 🔍
#This step looks dull but is critical. You need to confirm the issued certificate and your private key really are a pair.
Why does this matter?
#If the private key you used when generating the CSR is not the same one you're handing to ACM, the import might succeed, but HTTPS connections will fail at TLS handshake time. The browser would say something like "the certificate you presented and your signing key don't match." Painful to debug after the fact.
Compare modulus values
#For RSA key pairs, the modulus (the n in n = p × q) is identical between the public and private keys. You can MD5-hash both moduli and check that they match:
# Inspect the server cert (domain, expiry)
openssl x509 -in infra/certs/stg/certificate.pem -text -noout | grep -E "Subject:|Not After"

# Match the cert and the private key (the MD5 hashes must be equal)
openssl x509 -in infra/certs/stg/certificate.pem -modulus -noout | openssl md5
openssl rsa  -in infra/certs/stg/private-key.pem -modulus -noout | openssl md5

# Verify the chain
openssl verify -CAfile infra/certs/stg/chain.pem infra/certs/stg/certificate.pem
Expected output
## MD5 of the cert and the private key (must match!)
MD5(stdin)= 0123456789abcdef0123456789abcdef
MD5(stdin)= 0123456789abcdef0123456789abcdef
# verify
infra/certs/stg/certificate.pem: OKIf the two MD5 hashes are identical, you have a valid pair. If they differ, ACM will reject the import in Step 4 with Certificate and private key do not match.
When I first did this, I had been working in a different directory and accidentally imported a different private key. I spent a solid 30 minutes going "wait, this should be the same key…?" 😅. Treat the private key as if it lives in the directory you generated the CSR in, and don't move it around carelessly.
💡 If you're using ECC (elliptic curve) certificates, you compare the
pub(public point) instead ofmodulus. Extract the public key withopenssl ec -in key.pem -puboutand hash that. We're assuming RSA throughout this guide.
Step 4: Import into ACM (us-east-1)
#This is the heart of the article.
Why does it have to be us-east-1?
#Amplify Hosting uses CloudFront under the hood, and CloudFront can only reference ACM certificates that live in us-east-1 (N. Virginia).
If you import into Tokyo, Amplify simply won't find the certificate. So us-east-1 it is. This trips people up a lot.
Import command
#export AWS_PROFILE=your-profile
aws acm import-certificate \
--region us-east-1 \
--certificate fileb://infra/certs/stg/certificate.pem \
--private-key fileb://infra/certs/stg/private-key.pem \
--certificate-chain fileb://infra/certs/stg/chain.pem \
--tags \
Key=Environment,Value=stg \
Key=Project,Value=your-project \
Key=Domain,Value=your-app.example.comThings to keep in mind:
- ✅ Use
fileb://: Withfile://, the AWS CLI tries to interpret the contents as UTF-8 and may break.fileb://reads the file as raw bytes — the safer choice. - ✅ Always pass
--region us-east-1: even if your default profile is set to Tokyo, be explicit. - ✅ Tag your certificates: it's easy to lose track of "which environment, which domain?" later. At minimum, tag with Environment, Project, and Domain.
Expected output
#{
"CertificateArn": "arn:aws:acm:us-east-1:xxxxxxxxxxxx:certificate/xxxxxxxx-xxxx-xxxx-xxxx-xxxxxxxxxxxx"
}Save this CertificateArn — you'll feed it into Terraform variables in Step 5.
Confirm post-import
#aws acm describe-certificate \
--region us-east-1 \
--certificate-arn "arn:aws:acm:us-east-1:xxxxxxxxxxxx:certificate/xxxxxxxx-xxxx-xxxx-xxxx-xxxxxxxxxxxx" \
--query 'Certificate.{Domain:DomainName,Status:Status,Type:Type,NotAfter:NotAfter,InUseBy:InUseBy}'Expected output:
{
    "Domain": "your-app.example.com",
    "Status": "ISSUED",
    "Type": "IMPORTED",
    "NotAfter": "2027-05-06T23:59:59+00:00",
    "InUseBy": []
}
If Status is ISSUED and Type is IMPORTED, you're set. InUseBy will still be empty for now — it gets populated once Amplify is wired up in Step 6.
Step 5: Update the Terraform configuration 💡
#Now that the certificate is in ACM, we just need to wire Amplify up to it on the Terraform side.
Two things to keep in mind:
- We need a
us-east-1provider alias so Terraform can reference ACM there - In
aws_amplify_domain_association, setcertificate_settings { type = "CUSTOM" }
5-1. Add the us-east-1 provider
#In Terraform, the default provider is locked to a single region. Since we want to reference resources in us-east-1 only for the certificate, we add a provider with an alias:
# Main provider (e.g., Tokyo region)
provider "aws" {
  region = "ap-northeast-1"
}

# Provider for referencing ACM (us-east-1)
provider "aws" {
  alias  = "us_east_1"
  region = "us-east-1"

  default_tags {
    tags = {
      Environment = "stg"
      Project     = "your-project"
      ManagedBy   = "terraform"
    }
  }
}
5-2. ACM module (referencing the cert)
#We already imported the cert via the CLI, so on the Terraform side a data source or ARN reference is enough. Here we keep it simple and pass the ARN as a variable:
module "acm" {
  source = "../../modules/acm"
  providers = {
    aws = aws.us_east_1   # ← pass the us-east-1 provider
  }

  domain_name     = "your-app.example.com"
  certificate_arn = var.certificate_arn
}
Forget the providers = { aws = aws.us_east_1 } line and Terraform will look for the ARN in the default provider (Tokyo) — and you'll get a "no such ARN" error. Surprisingly easy to overlook ⚠️.
5-3. Amplify domain association
#This is the most important block:
resource "aws_amplify_domain_association" "custom" {
  app_id      = module.amplify.app_id
  domain_name = "your-app.example.com"

  # Use a custom certificate (already imported in us-east-1 ACM)
  certificate_settings {
    type                   = "CUSTOM"
    custom_certificate_arn = module.acm.certificate_arn
  }

  sub_domain {
    branch_name = module.amplify.branch_name
    prefix      = "" # apex / use the host name as-is
  }

  # If you want to attach multiple subdomains, add another sub_domain block
  # sub_domain {
  #   branch_name = module.amplify.branch_name
  #   prefix      = "www"  # → www.your-app.example.com
  # }
}
What certificate_settings does:
| Behavior |
|---|---|
| Amplify auto-issues and auto-renews an ACM certificate internally |
| Uses the imported certificate at the specified |
When you set type = "CUSTOM", custom_certificate_arn is required.
⚠️ The
certificate_settingsblock was introduced interraform-provider-aws v5.57.0. Older versions will fail withAn argument named "certificate_settings" is not expected here.If you're stuck, check the provider version first.
5-4. terraform.tfvars
#Drop the ARN you saved in Step 4 here:
certificate_arn = "arn:aws:acm:us-east-1:xxxxxxxxxxxx:certificate/xxxxxxxx-xxxx-xxxx-xxxx-xxxxxxxxxxxx"💡
terraform.tfvarsis where per-environment values go. A common pattern is either separate files for staging/prod (stg.tfvars/prod.tfvars) or separate directories per environment (infra/environments/stg/).
Step 6: terraform plan & apply
#Now just run it:
cd infra/environments/stg
terraform plan
terraform apply
The plan should show roughly these changes:
module.acm— ACM data source referenceaws_amplify_domain_association.custom— Amplify custom domain association (create)
After apply finishes, the Amplify domain association will start in PENDING_VERIFICATION status. Once you set the DNS record in Step 7, it transitions to AVAILABLE.
Step 7: DNS configuration (CNAME record)
#Once terraform apply finishes, Amplify hands you a DNS verification CNAME. You can see it in the console, but the CLI is faster:
aws amplify get-domain-association \
  --app-id <APP_ID> \
  --domain-name your-app.example.com \
  --query 'domainAssociation.subDomains[].dnsRecord'
Set the returned CNAME at your DNS provider (Route 53, Cloudflare, your internal DNS, etc.):
your-app.example.com CNAME <Amplify's value>.amplifyapp.comSample for managing DNS via Route 53
#If your DNS is also in Terraform, you can wire it up like this:
resource "aws_route53_record" "amplify_custom" {
  zone_id = data.aws_route53_zone.main.zone_id
  name    = "your-app.example.com"
  type    = "CNAME"
  ttl     = 300
  records = [aws_amplify_domain_association.custom.sub_domain[0].dns_record]
}
Note on apex domains (zone apex)
#If you want to attach example.com directly (instead of your-app.example.com) to Amplify, you can't put a CNAME on a zone apex — that's a DNS rule (RFC violation).
In that case, you have to:
- ✅ Use Route 53's ALIAS record (Amazon's extension)
- ✅ Use ANAME / CNAME flattening at your DNS provider
- ✅ Set up
www.example.cominstead and redirect from the apex
Amplify is internally CloudFront, so an ALIAS targeting CloudFront works, but the hosted zone ID is special — refer to the official docs when configuring it.
DNS validation can take 24–48 hours to settle. Be patient ☺️.
Verification: confirm the cert is actually applied ✅
#Once the status is AVAILABLE, check that the certificate the browser sees is genuinely your imported one. Skip this and you might end up shipping with Amplify's default cert and never noticing — easier to do than you'd think.
1. Browser lock icon
#Open https://your-app.example.com in a browser, click the lock icon → View certificate in the address bar, and confirm the issuer. If your CA's name is shown, you're good.
2. openssl s_client from the CLI
#For a faster check from the CLI:
openssl s_client -connect your-app.example.com:443 -servername your-app.example.com < /dev/null 2>/dev/null \
  | openssl x509 -noout -issuer -subject -dates
Expected output:
issuer=C = JP, O = Your Specified CA, CN = Your Specified CA Issuing G1
subject=C = JP, ST = Tokyo, L = Minato-ku, O = Your Organization Name, CN = your-app.example.com
notBefore=May  6 00:00:00 2026 GMT
notAfter=May  6 23:59:59 2027 GMT
If issuer matches your CA and subject's CN matches your domain — perfect ✅.
3. curl -v for behavior
#curl -vI https://your-app.example.com 2>&1 | grep -E "subject:|issuer:|TLS|HTTP/"If you see HTTP/2 200 (or 301/302) with the expected subject: and issuer: values, the connection is healthy.
Dealing with no auto-renewal: set up expiry monitoring
#As mentioned at the top, ACM does not auto-renew imported certificates 😇. If you don't notice the expiry, you're staring down a service outage — so always wire up monitoring.
Fortunately, ACM emits a CloudWatch metric called DaysToExpiry automatically. Just put an alarm on it and you've got the bare minimum.
Minimal Terraform alarm sample
## WARNING 30 days out
resource "aws_cloudwatch_metric_alarm" "cert_expiry_warning" {
provider = aws.us_east_1
alarm_name = "your-project-stg-cert-expiry-warning"
alarm_description = "ACM imported certificate expires in less than 30 days"
comparison_operator = "LessThanOrEqualToThreshold"
evaluation_periods = 1
metric_name = "DaysToExpiry"
namespace = "AWS/CertificateManager"
period = 86400 # 1 day
statistic = "Minimum"
threshold = 30
treat_missing_data = "breaching"
dimensions = {
CertificateArn = module.acm.certificate_arn
}
alarm_actions = [aws_sns_topic.cert_alerts.arn]
}
# CRITICAL 14 days out
resource "aws_cloudwatch_metric_alarm" "cert_expiry_critical" {
provider = aws.us_east_1
alarm_name = "your-project-stg-cert-expiry-critical"
alarm_description = "ACM imported certificate expires in less than 14 days. Reissue ASAP!"
comparison_operator = "LessThanOrEqualToThreshold"
evaluation_periods = 1
metric_name = "DaysToExpiry"
namespace = "AWS/CertificateManager"
period = 86400
statistic = "Minimum"
threshold = 14
treat_missing_data = "breaching"
dimensions = {
CertificateArn = module.acm.certificate_arn
}
alarm_actions = [aws_sns_topic.cert_alerts.arn]
}
# Notification target (SNS topic)
resource "aws_sns_topic" "cert_alerts" {
provider = aws.us_east_1
name = "your-project-stg-cert-alerts"
}
resource "aws_sns_topic_subscription" "cert_alerts_email" {
provider = aws.us_east_1
topic_arn = aws_sns_topic.cert_alerts.arn
protocol = "email"
endpoint = "admin@example.com" # ← replace with the real ops address
}💡 SNS Email subscriptions don't deliver until you click the confirmation link in the email AWS sends after subscribing. Don't forget to check your inbox after
apply🙏. To pipe to Slack, route through ChatBot or a Lambda.
Common errors and how to fix them 🔧
#To wrap up, here are errors I actually hit, plus root causes and fixes.
Certificate and private key do not match
#The most common one at ACM import time.
- Cause: The private key you're passing isn't the one used for the server cert's CSR
- Fix: Go back to the modulus comparison in Step 3 and confirm the pair. Use the private key from the directory where the CSR was generated.
Could not parse certificate
#A formatting error.
- Cause: Passed a DER file as-is / CRLF line endings / missing BEGIN/END markers
- Fix: Check PEM vs. DER with
head -1 server.cer, normalize to LF withdos2unix, runopenssl x509 -in server.pem -text -nooutto confirm it parses
An argument named "certificate_settings" is not expected here.
#Comes up at terraform apply.
- Cause: AWS Provider is older than v5.57.0
- Fix: Set
version = "~> 5.57"(or higher) inversions.tfand runterraform init -upgrade
Amplify's domainAssociation stuck at PENDING_VERIFICATION
#DNS validation isn't completing.
- Cause: Wrong CNAME / TTL too long / intermediate DNS cache
- Fix: Confirm the CNAME with
digornslookup, lower the TTL to 60–300, and diff the actual records againstaws amplify get-domain-association
NET::ERR_CERT_AUTHORITY_INVALID in the browser
#The chain returned at handshake time is incomplete.
- Cause: Intermediate CA missing from the chain file / wrong order
- Fix: Inspect what the server actually returns with
openssl s_client -connect ... -showcerts, rebuildchain.pem, then re-import to ACM
Provider produced inconsistent final plan
#Occasionally appears around the certificate_settings block.
- Cause: You tried to change
typeon an existing domain association - Fix: Don't
terraform destroy. Instead, detach the domain in the Amplify console, then on the Terraform side runterraform state rm aws_amplify_domain_association.customand re-apply
Wrapping up
#In this post, we walked through how to bring your own SSL/TLS certificate to AWS Amplify Hosting — end-to-end, from CSR through verification through expiry monitoring.
Recap:
- ✅ Certificates form a chain of "server + intermediate CA + root CA": split them correctly when importing into ACM
- ✅ Imported certs go in us-east-1 ACM (the region Amplify/CloudFront reads from)
- ✅ Verify the chain order and the cert/key pairing in OpenSSL upfront (modulus comparison)
- ✅ On the Amplify side, reference the ACM ARN via
certificate_settings { type = "CUSTOM" } - ✅ No auto-renewal — wire up the
DaysToExpiryCloudWatch metric for expiry monitoring - ✅ After deploy, verify with
openssl s_clientorcurl -vto see what the browser sees
Information about Amplify's custom certificate flow is scattered across ACM, Amplify, and Terraform docs, so I wrote this partly to organize my own thinking. Hopefully it helps anyone wrestling with the same setup.
If you have a better or simpler approach, I'd love to hear it 🙇♂️
Thanks so much for reading all the way through!
I post casually about engineering and life — feel free to follow! 🥺
References
#- Using SSL/TLS certificates - AWS Amplify Hosting
- Certificate and key format for importing - ACM
- Import a certificate - ACM
- aws_amplify_domain_association - Terraform Registry
- Bring your own SSL certificate to AWS Amplify Hosting
- Supported CloudWatch metrics for AWS Certificate Manager
- RFC 5246 - The Transport Layer Security (TLS) Protocol
